Restringing and voicing, 2000 - 01
The restringing project was finally begun Oct 22, 2000 and completed right
after Christmas. It took several weeks to raise the tuning to it's final
pitch. I tried full, A-440 tuning the first time it was strung in 1983 but
it just wouldn't stay there. In a day or two it would drift down a
semi-tone anyway, so I just tune it that way now and it seems to be happy
there. B-493.9 (for middle C) is called standard low pitch and was fairly
common during
the period before concert pitch was established.
At this point (Feb, 2001) the voicing is not completed and a minor
modification is still planned to replace the screws in the bottom that hold the key bed
in place. And the buff stop still awaits it's 61 little pads of
leather.
Restringing a guitar is a rather routine exercise. It takes about 20
minutes and consists of removing the old strings, unpackaging six ready made
strings, attaching them at the proper points and then tuning up to pitch.
Restringing a harpsichord in no way resembles restringing a guitar. First
of all new strings don't come in sets, they come in spools of wire. And
not just any wire. My stringing list as recommended by Frank Hubbard
includes brass wire from .022" to .014" and tin plated steel from
.014" to .008". And to make matters worse, the spools of wire
are not sold by the foot but rather by the ounce. So an ounce of .022
brass might be 100 feet long while an ounce of .008 steel might be 500.
Since I didn't know the lengths (nor did Hubbard for that matter), I simply
ordered one ounce of each of the ten different sizes required for my
instrument. In the end I ran out of only one size and had to send off a
quick reorder.
Making a string is not a particularly difficult task but does require a bit
of concentration. First you measure out the proper amount of wire which I
arrived at by experimentation. Ten inches to form the loop, ten to twenty
inches to wrap around the wrest (tuning) pin and finally the exact measurement
from tuning pin to hitch pin. After forming the loop and double wrap, the string
is attached to the hitch pin, threaded over the bridge and nut pins then wrapped
10 to 20 times around the tuning pin and finally threaded through a hole in the
pin. None of this is anywhere near as easy as it sounds. Several
hazards make it a fairly demanding task. First of all, after forming the
first ten loops, I had blisters on two fingers of each hand. I tried Band-Aids
but they interfered with the my ability to make neat wrappings so I
just ended up waiting a few days for the blisters to heal. Progress
was pretty slow at first with only a dozen strings completed each week. Each string length
had to be recalculated as the bridge to nut length was consistently shorter but
as the gauge got thinner, the number of wraps around the tuning pin
increased. I could have just added a foot or so to each string but that
would have eventually required extra spools from Hubbard. The biggest
limitation was that while winding the remaining wire around the tuning pin, the
length had to be short enough for me to retain tension on the wire while holding
only the end of the wire. Therefore the remaining string can't be any
longer than my arm before winding the tuning pin. Then next hazard was the
frustrating mishap of not maintaining tension while winding the pin. Easing the
tension even slightly would often result in the partially wound wrap springing
off the pin and becoming kinked and completely useless. About 10
to 12 strings ended up in the garbage for this very reason. The final and
most serious hazard was the tendency of the neatly trimmed strings to become as
sharp as needles so that when attaching the next string, my fingers were often
punctured by the previous string ends. I occasionally had to stop assembling
strings to wait for the bleeding to stop so that I wouldn't stain any of the
wooden parts. But finally after six weeks and 122 strings, the job was
complete. Well almost... After all the strings were installed, I tuned
them up to an octave below standard tuning and left them there for a week to
settle. After a call to Hendrik Broekman at Hubbard I tried pulling the
tuning up 4 half tones at once. In the first 12 strings I broke 6.
Back to making strings again. A week later everything was back to an
octave low again. Then I returned to my original plan of a half tone every
2 - 3 days. That took another 2 weeks and we finally arrived at B - 493.9
tuning and it's been there ever since.
Here's a few pictures from the process. Click on the pictures to see a
larger version.
 |
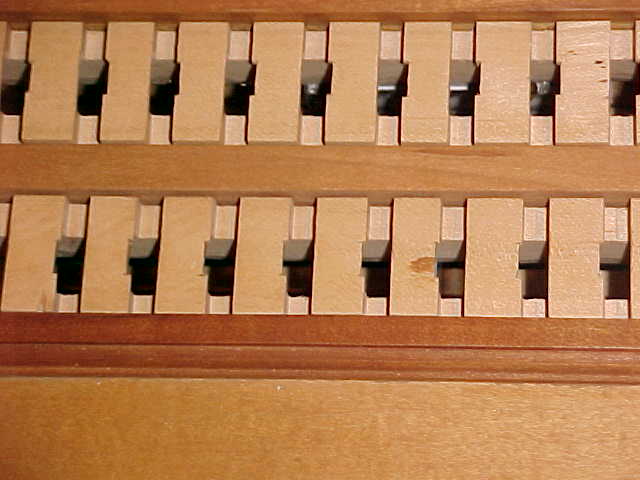
If you look closely at the front jack slide you'll see a
blood stain from the original stringing. After that I learned to
keep a cloth handy to keep the blood from dripping on the wood parts. |
 |
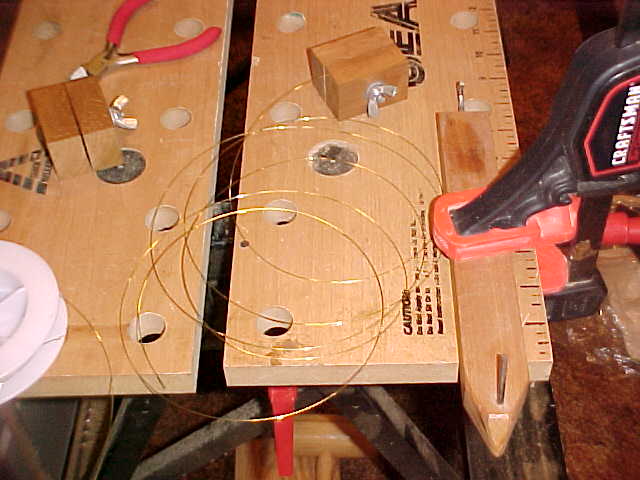
Enough wire to restring a harpsichord or two...
Maybe... |
 |
The tools to make strings: A pin to form the loop, a
hook on the opposite end to finish the winding, two wood blocks to hold
the wire, a pair of pliers, wire cutters and a spool of wire. Not
shown are a box of Band-aids and two or three clean handkerchiefs. |
 |
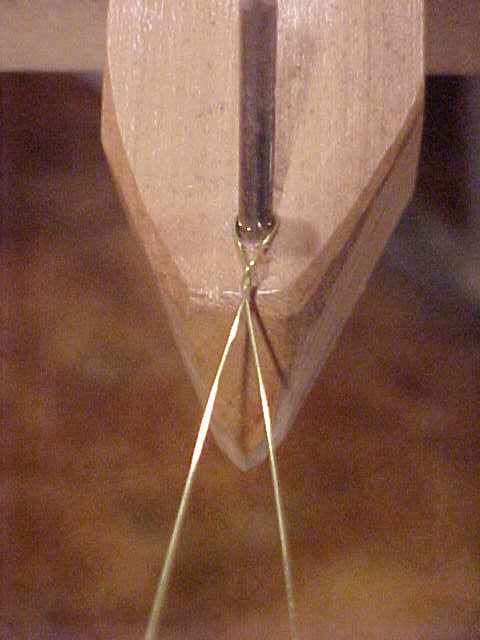
After fastening the work blocks, a loop is started about 10" from the end. |
 |
Next; six or eight winds, making sure that both wires bend
around each other. If only one does the bending then the result
will be a slip knot instead of a loop. |
 |
Reverse the jig for the winding hook in order to finish
the wrap. |
 |
This is a finished loop and no, that's not a dirty
fingernail. It's black from the time a holding block slipped off
the string and jammed my thumb against the side of the harpsichord. |
 |
The strings attach to the hitchpins via the newly formed
loop. |
 |
Next the strings pass over the bridge and are held in
place by a slight sideward tension against the bridge pins. |
 |
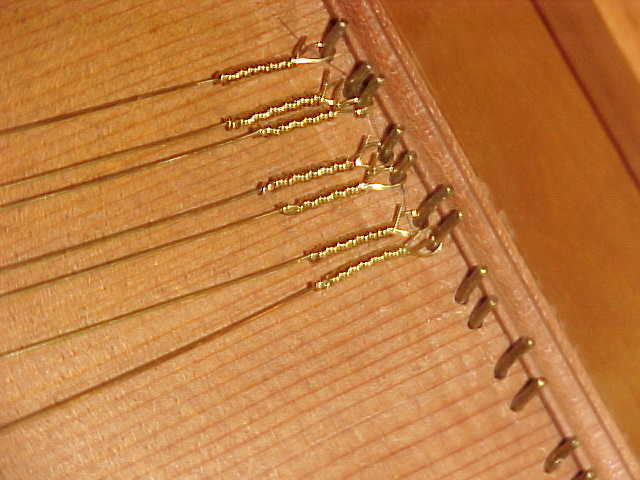
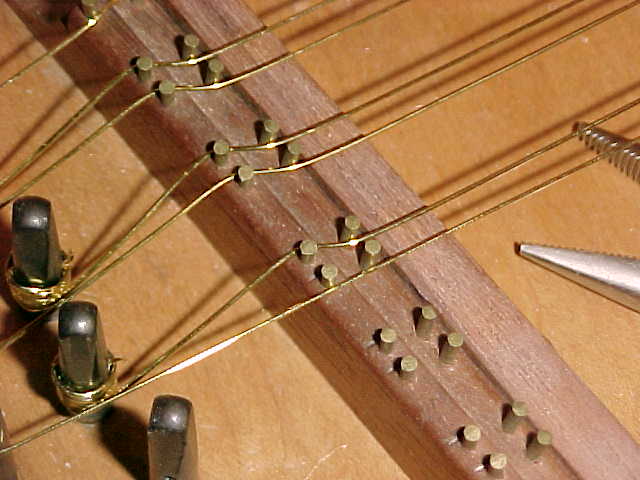
Finally the strings pass over the nut and around the
tuning pins. |
 |
Now that it's complete, the crack repair is nearly invisible and the sound quality is totally unaffected. After the
voicing is complete, the harpsichord will sound and play better than it ever has. |
Return to Howell Family Page